Learn to Draw - Step-by-Step Instructions for Successful Drawings
Westhat practise you know about drawing? The difference between drawing and painting is that drawing is not primarily based on representation by means of colors. The emphasis is on lines, dots, and the contrast between dark and low-cal. As an artist, you can create your drawings either freehand or with the help of tools. In this commodity, we will provide an introduction to learn to draw and drawing for beginners. You lot will learn all about the cartoon tools and devices, go to know the different cartoon techniques, and get an overview of the cartoon materials yous need for your drawn artwork.
Tabular array of Content
- 1 What Styles of Cartoon Are In that location?
- ii Learn to Draw -Media and Equipment Needed
- 3 What to Draw
- 4 The Different Basic Drawing Techniques
- iv.i Drawing for Beginners: The Grid Method
- 4.2 Highlights and Shadows: Hatching
- four.three Cartoon Perspective Step past Step
- 5 Drawing Equipment
- 5.1 Pencils
- 5.ii Crayons
- v.three Drawing Surface/Cartoon Paper
- 5.4 Sharpener, Eraser, and Other Important Accessories
- 6 Acquire How to Depict Step by Step
- 6.one Learn How to Draw With Books or eBooks
- 6.2 Online Drawing Lessons
- vi.3 Video Drawing Lessons
- six.four Drawing Lessons in Your Surface area
- 7 Cartoon Ideas
What Styles of Drawing Are There?
- Figurative: people, animals, nudes, etc.
- Perspective: landscapes etc.
Learn to Draw -Media and Equipment Needed
When y'all learn to draw, y'all can employ different cartoon materials. The principle is ever the same when drawing with pencil, crayon, chalk, and charcoal: the pigments are applied to the drawing surface by abrasion. The pencil and crayon are relatively fine, while the chalk and charcoal are coarser in texture. This should as well be considered when choosing the paper, because the coarser the drawing material, the coarser the surface of the cartoon basis should be.
The applied pigments are not fixed by binding agents and practise not penetrate the paper surface. This makes it necessary to gear up the surface later finishing your drawing work. This is done with a special fixative, which fixes the pigments onto the cartoon footing.
Then there is as well drawing with ink, which, unlike other cartoon materials, bonds with the newspaper and does non crave fixing. Ink can be diluted with water and tin likewise be fatigued over a large area. Then, to summarize:
- Pencil drawing and crayon cartoon are identical except for the difference between black/white and color. This is a traditional drawing technique, which is suitable for sketches and finer drawings.
- Charcoal and chalk drawings exercise not differ from pencil drawings except for the coarser representation
- Ink drawing is a graphic drawing technique, which is besides applied to paper. This is done either with a brush or a drawing pen.
- Then at that place is of grade the mixed technique, which combines the drawing technique with other painting techniques.
What to Draw
Desire to know how to start cartoon? Nosotros accept created some instructions beneath for anyone that wants to larn to draw, with basic drawing techniques. They will provide a step by step procedure with a detailed clarification and steps with photos. This allows you lot to learn the whole beginner drawing process intuitively
The Different Bones Drawing Techniques
When y'all larn to draw, at that place are different bones drawing techniques and drawing basics for unlike applications. We have listed the most important ones below for anyone wanting to know how to offset drawing.
- Cartoon
- Shading (Slight round movements with the broad side of the pencil)
- Hatching (system of many parallel lines in different directions, this way grey tones are created, east.g. for shadows)
- Mistiness (blurring of drawn lines over the entire surface, thus creating a lite-dark gradient)
- Frottage (place the leaf on a relief-similar object and rub the broad side of the pencil over it)
- Erasing
- Grid technique
- Drawing perspective

Drawing for Beginners: The Grid Method
If yous don't have any practical experience in drawing, starting to learn to draw is sometimes a fleck difficult. Here the grid technique can assistance yous out. Information technology is ideal for beginners in cartoon because yous don't need anything else except patience, some skill, and a pencil with scale. If yous desire to know how to start drawing, this is a good identify to begin.
To strengthen your beginner drawing skills, it is best to depict some images beginning. In this fashion, y'all volition develop a feeling for the drawing tool, the hand position, and movement sequences. To achieve improve results there is the filigree method. It helps you to dissever the drawing area into a grid so that you can focus on smaller which makes the drawing process much easier.
The grid method is besides often used to enlarge pocket-size drawings, for instance, if y'all want to pigment a wall with a pattern, but only accept an A4 sheet as a template.
Footstep by Step Guide for the Grid Method
- Choice your subject: We'll start with an A4 sail. At present divide this sheet of newspaper into equal rectangles. Divide the length past 6 and the width by four and describe the lines. Depict auxiliary points every 6cm, which you lot connect to the contrary side. Now you have drawn your grid and divided the drawing area into smaller areas. If you accept only one original template, you can likewise use transparent newspaper, which you fix over the original canvass and draw the grid on it. How this works you lot can see in our teaching tracing pictures.
- Transfer the filigree: Have a blank sail of paper and draw the aforementioned filigree over your original
- Get started: Now, focus on a single square of your grid and marking that area. Focus on the of import lines and contours first, and so draw the details. Ideally, apply a waterproof fineliner to draw, then y'all can erase the grid without impairment. If you lot have problems concentrating on a pocket-sized area, you lot can cover the surrounding grid with several sheets of paper. Repeat this procedure with all the grids on your drawing sheet.
- Refine the transition areas: You can at present erase the grid guidelines and see your work without disturbing elements. You can at present refine the transitions of the individual grid areas to create a beautiful piece of work of fine art.
Congratulations: You have successfully drawn your outset moving-picture show with the filigree method. Even for beginner cartoon, this method helps you to draw your outset beautiful pictures. You tin now turn to a more than complex pattern and improve step past step. To make the instructions fifty-fifty easier to follow, you lot can also lookout the following instructional video.
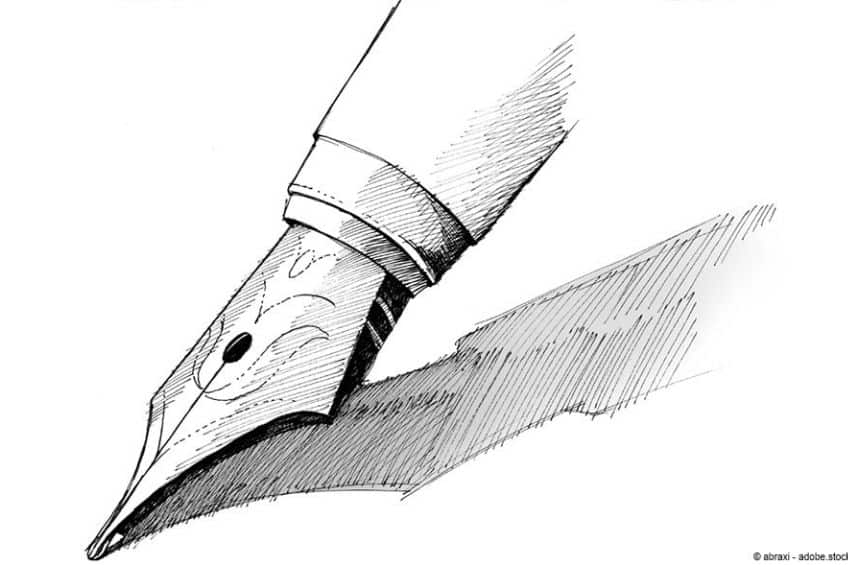
Highlights and Shadows: Hatching
If you want to exhale real life into your drawings, then you lot should definitely deal with cartoon in highlights and shadows. This is important to know when y'all learn to draw.

As you can meet in the drawing above, contours have been hatched to give the hand a 3-dimensional appearance. Hatching gives your drawing the necessary depth.
- Draw outlines: First describe the outline of your pattern, in our case a hand
- Look at your hand: Look closely at where the light is shining directly onto your hand. These areas remain white because they are more in focus. Border these areas with a fine line so that you know later on where to go out the area gratis
- Hatching shadows: The areas of your hand that are not directly lit can be darkened by hatching. Draw fine lines close together and crosswise. Alternatively, you lot can also blur these hatched areas with a newspaper wiper.
That's it, you created your first highlights and hatched shadows. Below we show you lot what types of hatching techniques are available:
Simple Hatching
Simple hatching consists of parallel, closely spaced strokes. Draw many of these lines parallel to each other. That's information technology. It is of import to go on the distances betwixt these parallel lines as even as possible to create the impression of a surface. You lot tin control the intensity by moving the strokes further autonomously or closer together. The further apart the strokes are placed, the brighter the hatched area is. The closer together, the darker the shadows you lot draw.
You can also hatch curved lines. This is ideal for circular objects to create a more than vivid look
A skillful example of a mixture of crosshatching (below) and simple hatching (correct)
Crosshatching
Crosshatching is basically identical. Again, you depict many parallel lines next to each other. Just then yous turn the drawing sheet xc degrees and do exactly the same. This gives you a cross-hatching. Of course, you can do the whole thing with curved lines for circular contours.
Drawing Perspective Step by Step
With hatching, you already bring a certain corporeality of depth into your drawn pictures. But if yous want to draw perspective, there are other things y'all should consider.
Perspective drawing allows you to draw 3-dimensional designs on a two-dimensional surface. You create an illusion of depth and infinite. In order to bring perspective into your drawings, you break the epitome down into its 3-dimensional geometric parts:
- Cube
- Sphere
- Cone
- Cylinder
A good example is a dog: it consists of cylindrical legs, a spherical head, and a cylindrical body. You can utilize this view to all objects. The aforementioned applies to landscapes or buildings. Here is a expert instance:

The subdivision into geometric shapes creates an upshot of depth. To achieve this event you can use the following steps every bit a guide:
-
Draw a horizontal line and ascertain a bespeak on it. Now draw auxiliary points at the edge of the prototype at regular intervals.
-
At present draw lines from your auxiliary points to your defined point on the horizontal line
-
You at present have guides, which bear witness you the perspective nicely.
To illustrate the following drawing technique, we recommend you accept a look at the video:
Drawing Equipment
For drawing, y'all demand only relatively little drawing materials. Nevertheless, before you buy, you need to think advisedly about what exactly you need for your purposes. Nosotros have summarized the most important materials for drawing below:
Pencils
Pencils are available in different degrees of hardness for different applications. The softer the pencil, the darker the line, the harder the pencil, the lighter the drawn line. We have briefly summarised the application purposes for the different degrees of hardness.
- 5B – 9B Very soft: shades, sketches, drafts
- B – 4B soft: freehand drawing and writing, shading
- F – HB medium: linear drawing, writing
- 2H – H difficult: geometric and technical drawings
- 5H – 2H very hard: Graphical representations, technical drawings
- Gear up of 12 art pencils ranging from 8B - 2H
- Superior leads fabricated from finely ground graphite and clay
- Premium polish pencils that never scratch
View on Amazon

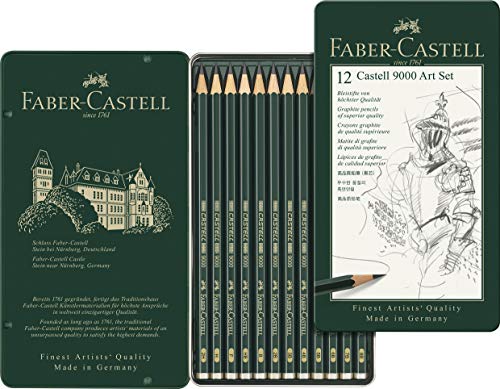
- A set of 12 pencils with varying degrees of hardness
- Loftier breaking strength, multiple uses
- The pencils are packed in a convenient tin case
View on Amazon
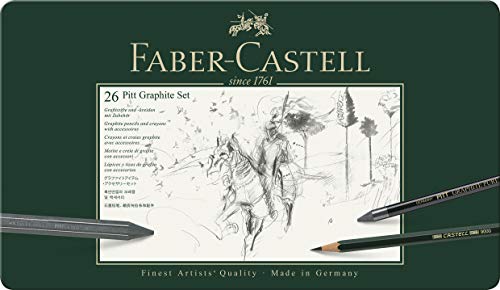
- A full 26 piece graphite pencil prepare
- Suitable for a wide range of styles and applications
- A wide range of pencil options. degrees of hardness, and accessories
View on Amazon
Crayons
Here you should definitely pay attending to good quality. High-quality colored pencils take softer leads, which makes the color application richer and more covering. With the higher quality colored pencils, at that place is likewise a very wide range of different color shades.

- A 36 piece fix of pencils, pastels, and accessories
- packed into a convenient tin instance
- Includes everything yous need for colored drawing
View on Amazon

- A quality set of 48 dissimilar colored pencils
- 3.4mm cadre pencils produce a fine point for detailed work
- The pencils are housed in a special wooden case
View on Amazon
Drawing Surface/Cartoon Newspaper
Not all paper is the same – apart from the format, at that place are other qualities and features, such as the grammage of the paper and the surface finish. We can recommend the following drawing paper:

- Includes 2 thick and large sketchbooks with 200 pages in full
- A nine x 12" sketchbook with spiral bounden
- Durable acid-complimentary cartoon paper
View on Amazon

- An A4 sketch pad of fifty sheets
- Quality 120gm paper - perfect for drawing
- An off-white shade with a smooth texture
View on Amazon
Sharpener, Eraser, and Other Important Accessories
When learning how to describe you need some accessories likewise the material listed in a higher place. This ensures that you are well prepared for whatsoever application.

- A high-quality plastic body sharpening machine
- Transparent shavings tray for convenient use
- Adjustable pencil bespeak and automatic cut stop
View on Amazon

- Innovative art erasers to make pencil drawing much easier
- The erased surfaces stay clean with no marks or smears
- The best tool for erasing polymer/graphite pencil lines
View on Amazon

- 6 x blending stumps, half-dozen x tortillions, 2 x sandpaper blocks
- Includes a diverse range of sizes
- Suitable for a wide application of artistic styles
View on Amazon

- A full spirograph set with over 45 pieces
- Includes reusable Spiro-Putty top set up pieces in identify
- Comes in a durable case with a born work surface
View on Amazon
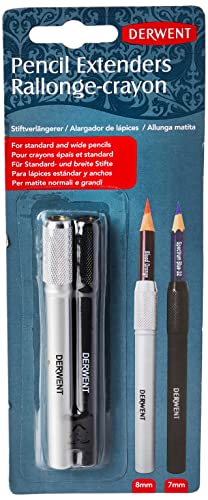
- Lets you utilise the entire pencil without waste
- Adjustable screw fitting for a secure hold
- Suitable for pencils up to 8mm
View on Amazon
Learn How to Draw Step by Step
If you want to learn how to depict, you can do this in several ways. In the post-obit ways, you lot can acquire how to draw step by pace and thus develop from beginner to artist.
- Learning how to draw books as an e-volume or as a printed book
- Online drawing basics courses
- Video instructions
- Drawing courses in your area
Learn How to Draw With Books or eBooks
Whether for beginners, advanced artists, or professionals, there are suitable books or eBooks to larn how to describe. At that place is a massive amount of books available, so the pick tin be difficult. The reward of this fashion of learning is that you lot can usually trust that the quality of these learning media is good. Commonly, the author of a book knows his arts and crafts. Also, there are always inexpensive offers, so that you can larn a lot of knowledge with little money.
For your introduction to cartoon. we can recommend the following books, with which y'all can larn all the important steps:
- A articulate and easy guide to successful drawing
- Cartoon tutorials for many different designs
- Learn techniques and cartoon styles
View on Amazon

- Learn to describe whatsoever object or environment from scratch
- A useful guide for all skill levels
- Teaches different techniques and tricks for drawing
View on Amazon
Online Drawing Lessons
Online drawing lessons are a relatively new course of learning. Here you have the best of all worlds with y'all: moving images from videos, but oftentimes also written information for looking up and reading. You will be introduced to the topic step by step and can thus constantly familiarize yourself with the topic. Y'all can deal with the topic at your own pace.
Video Cartoon Lessons
The advantage of video drawing lessons is that you tin learn from costless videos about individual drawing techniques on Youtube. The disadvantage, all the same, is the quality or the level of cognition of the video makers is not bodacious. Nevertheless, it makes sense to sentinel certain videos.
Drawing Lessons in Your Area
Depending on the style, do you adopt to attend cartoon lessons in your area and acquire your noesis that way? There is also a broad range of drawing lessons from which you tin can choose. Nevertheless, this blazon of learning how to depict is usually relatively expensive, as the rental costs of the workshop and materials are included in the course price. You are also leap to the dates of the drawing lessons.
Drawing Ideas
If y'all demand ideas for themes and artwork, you'll find them in defended eBooks on the subject, along with lots of tips and tricks.

- A guide on how to draw figures and anatomy
- Reveals useful cartoon techniques
- A beginners guide for drawing people
View on Amazon
- A detailed guide on how to depict unlike animals
- Helps develop technical drawing skills for all artists
- Includes l different guides on animal drawings
View on Amazon
Drawing is a technique that provides the framework for many important works of art, as well as being an essential style of art in its own right. It doesn't accept that much to get started with drawing basics, and so information technology is a great activeness for beginner artists to practice. The guide in a higher place should take answered any questions yous may have had on how to depict and getting started with drawing nuts. Nosotros hope you enjoy this rewarding artform!
Source: https://craft-art.com/learn-to-draw/
0 Response to "Learn to Draw - Step-by-Step Instructions for Successful Drawings"
Post a Comment